- DC Power Products
- Anderson Powerpole Connectors Powerpole PP15-45, SB175, Housings, Contacts, Mounts, Kits
- Adapter & Extension Cables Powerpole, Automotive Plug, SAE, 5.5x2.1mm, Two-Way Radio
- Batteries (LFP/LiFePO4) Bioenno Power, Victron Energy, LiFePO4/LFP Batteries
- Battery Management & Relays ACR/VSR Isolators, LVD, Combiners, Switches, Relays, Timers, 12V/24V
- Charging, Conversion & Supplies Battery Chargers AC/DC & DC/DC, MPPT, Pure Sine Inverters, Power Supplies
- Circuit Protection & Fuses Blade Fuses, ANL/MIDI/MRBF, Breakers, Holders, Fuse Blocks
- Crimping & Electrical Tools Ratcheting Crimpers, TRIcrimp, Strippers, Cutters, Die Sets, Coax
- Panel-Mount Components USB-C PD, 12V Socket, Rocker Switch, Volt/Amp, Bezels, Pass-Thru
- Power Distribution PowerHubs, Bus Bars, Terminal Blocks, Power Posts, Fuse Blocks
- Power Monitoring & Meters Voltmeter, Ammeter, Watt Meter, Shunt, SoC, Bluetooth, VRM
- Solar & Portable Power Folding Solar Panels, MC4, MPPT, Portable Power, Cables
- Terminals & Wiring Accessories Heat Shrink, Ring/Lug, Spade/Fork, Splice, Waterproof, Marine
- Wire & Cable
- Wire & Cable Reels Red/Black Zip Cord, Hookup Wire, PTFE, Silicone, Welding Cable
- Terminals & Wiring Accessories Heat Shrink, Ring/Lug, Spade/Fork, Splice, Waterproof, Marine
- Custom DC Power Cables Design Custom DC Cables, Live Pricing, USA Built & Shipped Fast
- Adapter & Extension Cables Powerpole Cables, Adapter Cables, Extension Cables
- Two-Way Radios
- Help Center


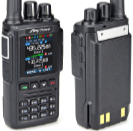
Anytone AT-D868UV DMR Firmware Update
What's new in version 2.37?
- Resolved the issue where sometimes the radio will transmit to wrong TG.
- Resolved the issue that load the wrong codeplug into radio sometimes may cause the radio can not power on.
Do I need to update my firmware?
Anytone radios generally ship with the latest firmware version installed. You can determine your current AT-D868UV firmware version by pressing the softkey on your radio under the menu icon, then selecting Settings then Device Info and then scroll down to Firmware Ver. If the version displayed is less than 2.37, please continue with the firmware update instructions below.
Backup your current codeplug
Updating the firmware on your Anytone AT-D868UV will erase your radio's current programming. To create a backup using the programming software, read from your radio and then save this file to your desktop or temporary folder.
Firmware update procedure
- Install the updated Anytone AT-D868UV Programming Software v1.37 if you have not already done so
- Install the Anytone AT-D868UV USB cable driver if you have not already done so. Select x86 for 32-bit systems, select x64 for 64-bit systems.
- Download the Anytone AT-D868UV Firmware v2.37. Extract the files located in this zip file to your desktop or a temporary folder.
- Run the QX Code Pro Update program extracted from the firmware zip file. We suggest you check the option to create a desktop shortcut link.
- To prepare your radio for the new firmware, first, turn the radio off. Hold down the PTT and alarm key (top orange button) and at the same time, turn the radio on. The red LED should blink and you may release all buttons.
- Connect the Anytone USB programming cable to both your radio and computer
- Run the previously installed QX Code Pro Update program from the desktop shortcut
- Click Open Update File. Navigate to your extracted firmware zip temporary folder and locate the file 868UV_1G_V2.37.spi.
- Select your com port
- Click Write to begin installing the latest firmware
- Important: After the firmware is written successfully, you will need to initialize the radio.
- Turn the radio off
- Hold down the PTT and PF1 button and at the same time, turn the radio on.
- The radio will display the message "Are you sure you want to Initialize radio?". Select Confirm (the green bar key). Please wait.
- After the radio restarts, you will have the option to set the date and time. You may optionally set the date using the Up, Down and P1 keys. When GPS is enabled, it will display the correct time and date automatically.